

Content on this page is for a product or feature in controlled release (CR). If you are not part of the CR group and would like more information, contact your CXone Account Representative.
This page is for Cloud Storage in AWS. If you use Cloud Storage in Azure, see the Azure storage section of the Cloud Storage Services online help.
The file hold and release feature lets you place holds on files to prevent them from being deleted by any method, automatically or manually. Holding files also stops them from progressing in their life cycles. Holding files allows you to easily keep files for a period of time for legal reasons, but you can hold files for any reason. You can release held files whenever you need to. To enable the hold and release feature, you need Cloud Storage Services and a separate litigation hold license key. To obtain a license and set up the feature, contact your CXone Account Representative.
When you create a hold request, you search for and select the files you want to hold. That request is then processed and each of the selected files is held in Cloud Storage. Similarly, when you create a release request, you search for and select the files you want to release. The files are released after a short processing period. Release requests are for individual files, not for existing holds. This means that you can release only some of the files contained in a hold if you want to. You cannot, however, release files from two different holds in the same release request. It is important to specify a reason when you place a hold or release request. It helps you to create a record of audit details for user actions.
File Search
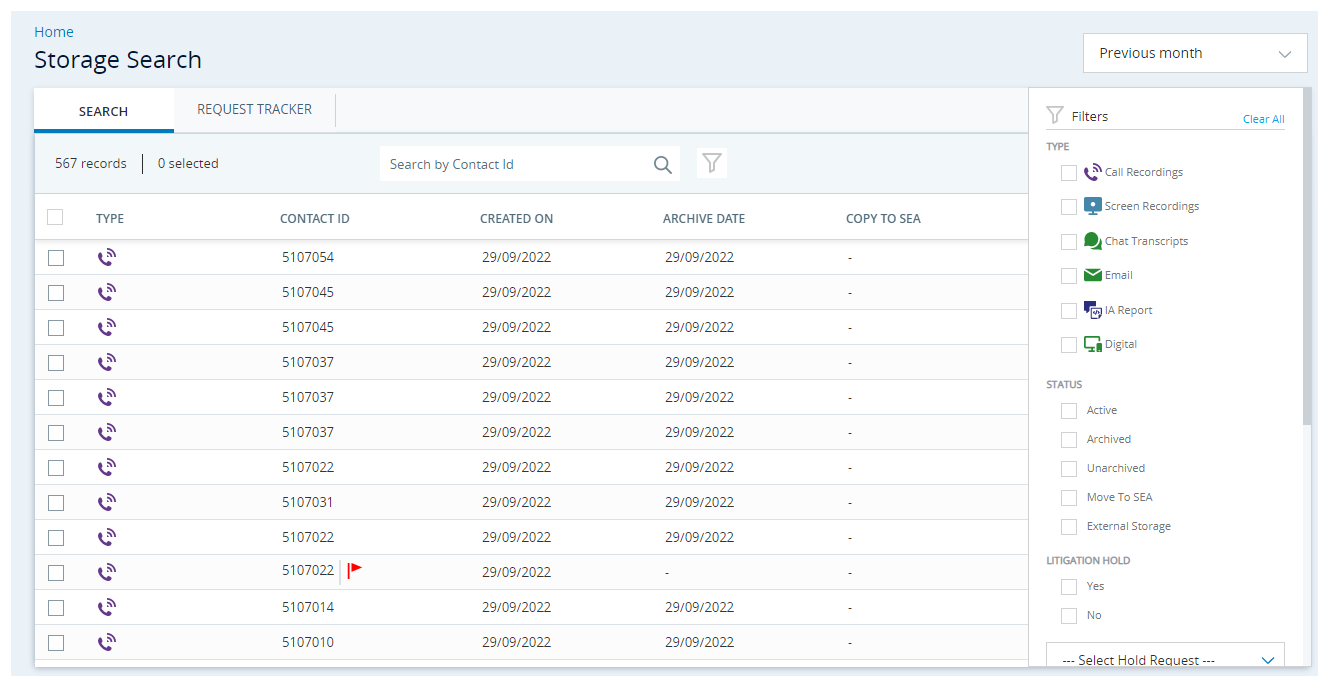
When you enable the hold and release feature, a Search page becomes available in the Cloud Storage navigation menu. This page helps you to quickly and easily locate files for hold or release request, and to see your current hold and release requests. The page includes two tabs: Search and Request Tracker.
-
Search tab—Lets you search all your files by time period. You can optionally include a contact ID or set of contact IDs to include along with the selected date range. You can further filter your search by agent, skill, team, and DNIS. When you submit your search, the page displays a table containing the files that match your search. You can further filter based on file type, file status, and hold status. A red flag next to the Contact ID indicates that a file is currently being held.
- Request Tracker tab—Lets you see a table of hold and release requests and their current status. For each request, you can download a spreadsheet with details about the files contained in the request. Before you create a release request, it's important to determine which individual files you want to release. You can do this by either downloading the spreadsheet for the hold request or filtering the Search tab by the name of the hold request that contains the files you want to release.
Key Facts About Hold and Release
- Litigation hold is only available for environments using default cloud storage.
- Hold requests take a few minutes to process before the files are held. It is possible that a user could delete a file between the time of the hold request and when the file enters the held state.
- The maximum number of files you can include in a single hold or release request is 500.
- You can place a hold on files from active and long-term storage.
- You can use the file retrieval process to pull held files from long-term storage.
Place Files on Hold
Required permissions: Litigation View, Hold, File Search On
-
Click the app selector
 and select Admin.
 -
Go to Cloud Storage > Search.
-
On the Search tab of the page, enter a contact ID or comma-separated (no spaces) list of contact IDs to search by and select a date range from the drop-down. Alternatively, you can select a date range without any contact IDs.
-
If you want to filter your search results more, click Advanced Search. Select any Agent, ACD Skill, Team, and DNIS you want the search results to match.
Searches with multiple filters assume an AND operator between each filter type and an OR operator between each selection in an individual filter. For instance, you select:
- Lydia Bennet and Kitty Bennet in the Agent filter.
- OBPredDialer and InboundVoice in the Skill filter.
- Nothing in the Team and DNIS filters.
The search finds interactions that either Lydia Bennet or Kitty Bennet handled using either the OBPredDialer or InboundVoice ACD skill
 Used to automate delivery of interactions based on agent skills, abilities, and knowledge.
 -
Click Search.
-
If you want to further refine your search results, click the filter button
 . In addition to the filter options you had on the previous page, you can filter based on several criteria. The same rules explained in the previous tip apply. When you're satisfied with your filters, click Apply. Learn more about the filters in this step
Field Details Type The type of files you want to find. The options available to you depend on your license. Possible types are:
-
Call Recordings
-
Chat Transcripts
-
Digital
-
Email
-
IA Report (for Interaction Analytics)
-
Screen Recordings
Status
The current status of the files you want to find. Possible statuses are:
- Active
- Archived
- Unarchived
- Move to SEA
- External Storage
Litigation Hold Whether the files you want to find are currently protected by a litigation hold (Yes) or not (No). LCM Disposition The dispositions applied to the interactions for the purpose of controlling life cycle events. This only applies to file Types of Call Recordings and Screen Recordings. This is only available if you have purchased a license for disposition-based TTL The period of time these interactions are retained and the timing of their deletion. You define the TTL settings for your interactions..Agent The agents associated with the files you want to find. DNIS For call recording and screen recording files only, the DNIS associated with them Skills The ACD skills associated with the files you want to find. Team The teams associated with the files you want to find. -
-
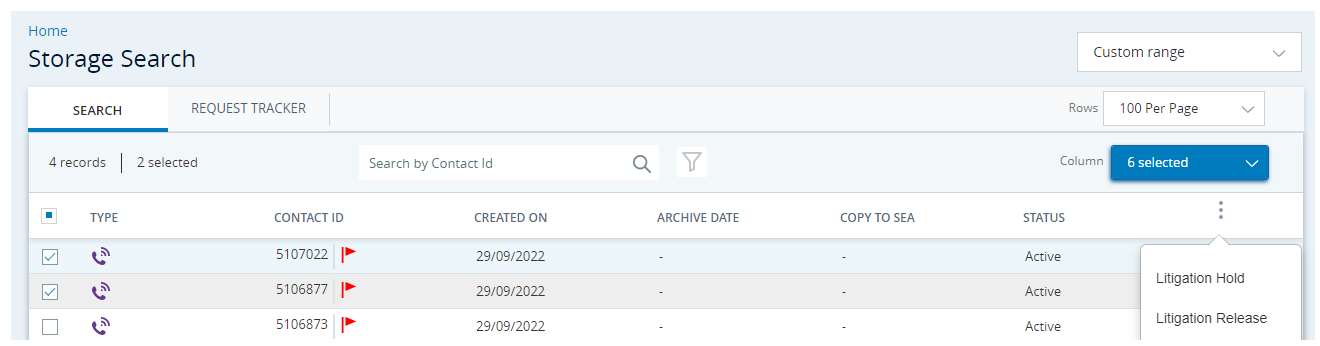
Using the checkbox column of the table, select the files you want to place on hold. Click the actions button
 in the top right corner of the table header row. In the drop-down, click Litigation Hold.
 -
In the Are You Sure? window, enter a Name for the hold to help users in your environment quickly identify the hold. Enter a reason for the hold. Read the About Litigation Hold Process information, select I understand the above information, and click Confirm.
The hold request appears in the Request Tracker tab with a Status of Pending. It takes a few minutes for the hold request to complete. If you want to view more information about the hold later, you can hover over the comments icon  to see the reason for the hold. You can also click the download button
  to download a spreadsheet containing details about the files included in the hold.
Release Files from a Hold
Required permissions: Litigation View, Release, File Search On
-
Click the app selector
and select Admin. -
Go to Cloud Storage > Search.
- Open the Search tab.
- Select a good date range for the files you want to release. Click Search.
- Click the filter button ().
-
From the ---Select Hold Request--- drop-down, select the holds that contain the files you want to release. From the Litigation Hold category, select Yes. Add any other filters you want to use to refine your search. Click Apply.
While you can choose to release only some of the files contained in a hold, you cannot release files from two or more separate holds in the same release request.
-
Using the checkbox column of the table, select the files you want to release from a hold. Click the actions button
in the top right corner of the table header row. In the drop-down, click Litigation Release. -
In the Are You Sure? window, enter a Name for the release to help users in your environment quickly identify the release. Enter a reason for the release. Read the About Litigation Release Process information, select I understand the above information, and click Confirm.
The release request appears in the Request Tracker tab with a Status of Pending. It takes a few minutes for the release request to complete.