

If you select Integrated Softphone when you log in to NiCE CXone Agent Workspace (Embedded) (Agent Embedded), you should add the NiCE CXone Agent WebRTC Extension to your browser. The Agent WebRTC Extension ensures that your connection remains stable while your browser is loading. It also ensures that:
-
Your calls aren't dropped or interrupted, even when other applications that require lots of system power are running in your browser.
-
Your agent leg
 Your audio connection to NiCE CXone for calls and voicemails. stays connected, even if your browser is refreshed. This is because the Agent WebRTC Extension operates in a separate browser window.
 -
Your incoming calls aren't automatically refused.
-
You can accept incoming calls. Without the Agent WebRTC Extension, Accept may be disabled. If auto-accept is enabled in Settings
 and your agent leg is connected, you will automatically receive calls without clicking Accept.
 -
You can switch between multiple browser tabs with Agent Workspace (Embedded) (Agent Embedded) open in Salesforce. Without the Agent WebRTC Extension, calls may drop and Accept may not appear when switching between these tabs.
The Agent WebRTC Extension is supported in Google Chrome and Microsoft Edge. In both browsers, you can download it from the Chrome Web Store.
Some information is passed from NiCE CXone to the Agent WebRTC Extension to establish a voice path. The extension doesn't collect any personal, login, or browser data.
The Agent WebRTC Extension does not include echo or noise cancellation.
Add the Agent WebRTC Extension to Google Chrome
The following instructions let an individual user add the extension to their Chrome.
-
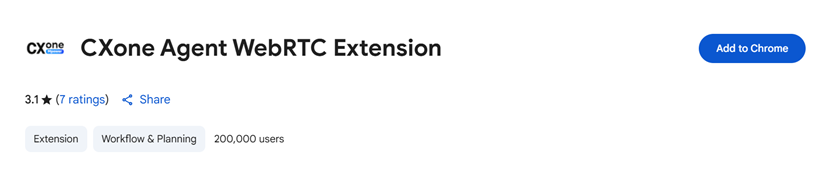
Navigate to CXone Agent WebRTC Extension
 in Google Chrome. This links to an external site that is not maintained by NiCE.
 -
Click Add to Chrome.
- In the pop-up that appears, click Add extension.
- In the pop-up that appears asking for microphone access, click Allow.
Bulk-Add the Agent WebRTC Extension to Google Chrome
You can install the Agent WebRTC Extension for all users in your organization. This adds the extension to every agent's Chrome browser. Agents do not need to install it themselves.
Before you begin:
-
You must be a Chrome Enterprise administrator to do this.
-
You may need the Agent WebRTC Extension ID: gcfjbjldfomnopnpdjajjfpldkkdmmoi.
-
Log in to the Google Admin console
with an administrator account. -
Go to Devices > Chrome > Apps & extensions > Users & browsers.
-
Select the Organization Unit (OU) you want to manage.
-
Click the plus sign and select Add from Chrome Web Store.
-
Search for and select the CXone Agent WebRTC Extension
. -
In Installation Policy, select Force Install.
-
Click Save.
You may also want to bulk-enable microphone access for the Agent WebRTC Extension.
Add the Agent WebRTC Extension to Microsoft Edge
-
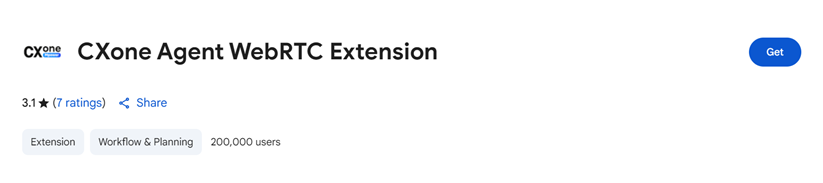
Navigate to CXone Agent WebRTC Extension
in Microsoft Edge. This links to an external site that is not maintained by NiCE. - If you haven't already enabled Chrome extensions for Edge, click Allow extensions from other stores in the blue bar at the top.
-
Click Get.
- In the pop-up that appears, click Add extension.
- In the pop-up that appears asking for microphone access, click Allow.
Enable Microphone Access
If you already have the Agent WebRTC Extension, and haven't granted it access to your computer's microphone, you will receive an error message when you log in to Agent Workspace (Embedded) (Agent Embedded) with Integrated Softphone. The option Agent Workspace (Embedded) (Agent Embedded) gives you to provide microphone access will be disabled.

To enable this option, follow the steps below for your browser.
In Google Chrome
-
In the top right of Google Chrome, go to Options
 > Settings.
 -
In the left menu, click Privacy and security.
-
Select Site settings.
-
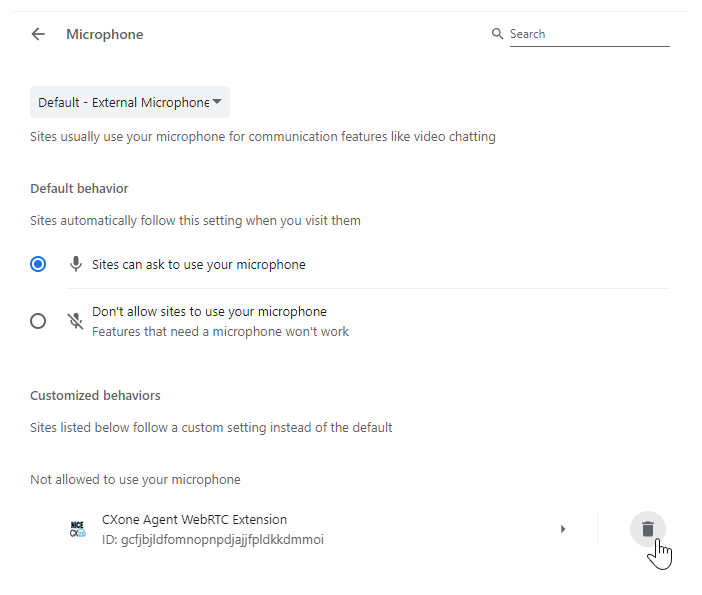
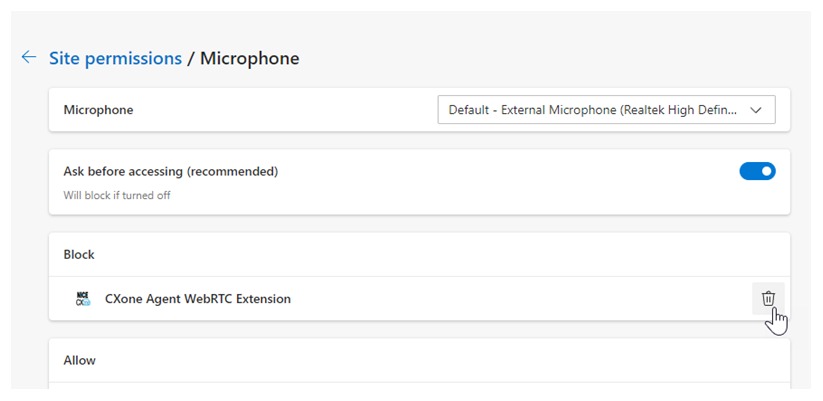
Under Permissions, click Microphone.
-
In the Not allowed to use your microphone section, locate
 next to it. This removes it from the list of extensions blocked from using your microphone.
 -
Click Extensions
 in the top right.
 -
Next to
> Options. -
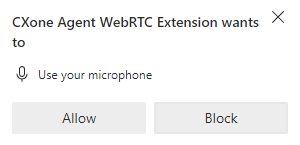
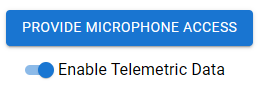
On the page that appears, click Provide Microphone Access.
-
In the pop-up that appears, click Allow. You can now use Integrated Softphone in Agent Workspace (Embedded) (Agent Embedded) without errors.

In Microsoft Edge
-
In the top right of Microsoft Edge, go to Settings and more
 > Settings
  .
. -
In the left menu, click Cookies and site permissions.
-
Scroll down to the All permissions section. Select Microphone.
-
Under Block, locate
 next to it. This removes it from the list of extensions blocked from using your microphone.
 -
In the top right, go to Settings and more
> Extensions  .
. -
Next to
 > Extension options.
 -
On the page that appears, click Provide Microphone Access.
-
In the pop-up that appears, click Allow. You can now use Integrated Softphone in Agent Workspace (Embedded) (Agent Embedded) without errors.
Bulk-Enable Microphone Access in Google Chrome
You can enable microphone access for the Agent WebRTC Extension for all users in your organization. This removes the need for each agent to enable microphone access manually. You must be a Chrome Enterprise administrator to do this.
-
Log in to the Google Admin console
with an administrator account. -
Go to Devices > Chrome.
-
Click Settings in the left menu.
-
Click Users & browsers.
-
Select the Organizational Unit (OU) you want to manage.
-
Scroll to the Hardware section. Make sure the Audio input (microphone) policy is set to Enable audio input.
-
Add this extension ID to the Audio capture allowed URLs allowlist: chrome-extension://gcfjbjldfomnopnpdjajjfpldkkdmmoi/.
-
Click Save. Instruct your agents to verify the policy by typing chrome://policy in their browser and clicking Reload Policies.
Enable Telemetric Data
If you use ChromeOS, you can enable Agent Workspace (Embedded) (Agent Embedded) to access your device's telemetric data: processor name, CPU usage, and memory usage. This information appears in Settings . To enable this option, follow the steps below for your browser.
In Google Chrome
-
In the top right of Google Chrome, click Extensions
. -
Locate
> Options next to it. -
Turn on Enable Telemetric Data.
In Microsoft Edge
-
In the top right of Microsoft Edge, click Extensions
. -
Next to
> Extension options. -
Turn on Enable Telemetric Data.