

To manage teams in Admin > Teams, you must have ACD enabled for your system. If you are using NiCE CXone Real-Time Third Party Telephony Recording (Multi-ACD), you may see errors when you try to manage teams in Admin > Teams.
You can add teams one at a time or in bulk. You can also assign employees to teams one at a time or in bulk.
Create a Team
Required permissions: Admin > Teams > Create, Divisions > Division Assignment (only for systems configured for divisions)
-
Click the app selector
 and select Admin.
 -
Click Teams.
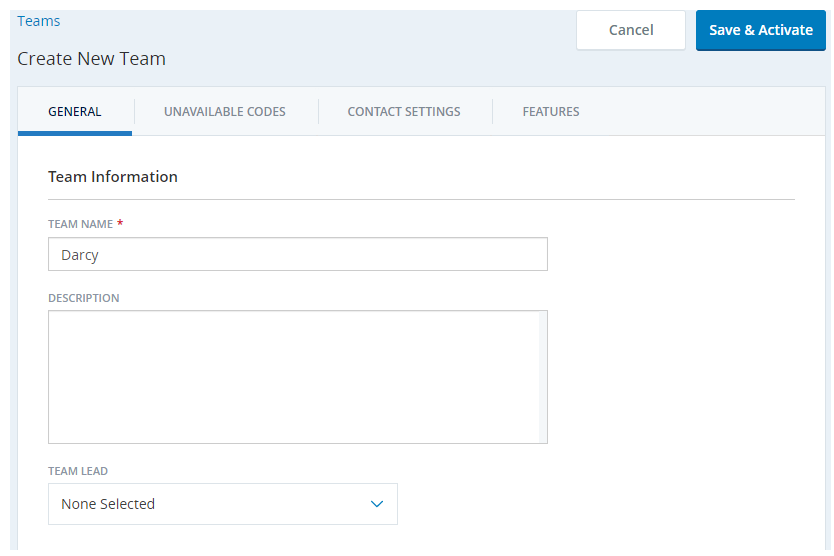
- Click New Team.
- Enter a Team Name and a Description. The name cannot have more than 30 characters and cannot have the following special characters: /, !, <, >, ?, %, ,, ".
-
If you want a record of who the team lead is, select the name of the Team Lead from the drop-down. Any active user can be the team lead. A single user can be the team lead for multiple teams.
-
If your system is configured for divisions, set Division to the division
 Separate data securely between lines of business. Data can only be accessed from within the division it's part of. you want to assign the team to.
 If you haven't created the division this team will belong to yet, you can select Add new division. In the pop-up window, enter a unique Division Name and specify the Parent Division. You can leave Parent Division as Default if you don't want the new division to be a subdivision.
After you select a team's division assignment, you cannot change it.
- If you want to add unavailable codes to the team, click Unavailable Codes. Click Add Unavailable Codes and select each unavailable code you want agents on this team to see in their agent application. When you're finished selecting codes, click Confirm.
- Click Contact Settings to configure the team contact settings.
- Click Features.
-
Select the checkboxes for each feature or product you want to enable for the team. You'll be billed for each agent in the team for the feature, whether the agent actually uses the feature or not.
Learn more about fields in this step
Field Details Performance Management Enables members of the team to use the Performance Management application. You can also enable these features:
-
Performance Management Gamification
-
Performance Management Chat Message
-
Performance Management Coaching
Audio Recording
Enables members of the team to record voice conversations.
Screen Recording Enables members of the team to record the screen during interactions.
Quality Management Enables members of the team to use Quality Management (CXone).
Quality Optimization Enables members of the team to use features available with the Quality Optimization license.
WFM Advanced Enables members of the team to use features available with the WFM Advanced license.
WFM Essentials Enables members of the team to use features available with the WFM Essentials license.
WFO Essentials Enables members of the team to use features available with the WFO Essentials license.
WFO Advanced Enables members of the team to use features available with the WFO Advanced license.
CXone Customer Authentication Enables members of the team to use the NiCE CXone Customer Authentication product.
-
- Click Save and Activate.
Add Users to a Team
Required permissions: Teams Edit and Employees Edit
Each employee must be assigned to a team. If you attempt to remove an employee from a team, you're prompted to add them to another. For teams that are assigned to divisions![]() Separate data securely between lines of business. Data can only be accessed from within the division it's part of., you can only add users who are in the same division as the team.
Separate data securely between lines of business. Data can only be accessed from within the division it's part of., you can only add users who are in the same division as the team.
-
Click the app selector
and select Admin. -
Click Teams.
-
Click the team you want to add users to.
-
Click the Assigned Users tab and then click Add Users.
-
In the Add Users window, select the checkbox next to the names of the users you want to add, or select the checkbox next to the Name column heading to add all users. The Selected counter shows how many users you have selected.
-
Click Confirm, then click Save.
Edit Teams
You can edit teams if you have permission to do so. You may also need additional
- To add or remove unavailable codes, you must have Teams View and Unavailable Codes Edit permissions.
- To duplicate a team, you must have the Teams Create permission.
- To deactivate or reactivate a team, you must have the Teams Deactivate permission.
Configure Contact Settings
You can configure how you want agents in this team to handle interactions. You can configure your agents for static delivery, which uses legacy Routing. You can also configure your agents for dynamic delivery, which allows your agent to use advanced Routing.
Configure Contact Settings for Dynamic Delivery
Required permissions: Teams Edit
-
Click the app selector
and select Admin. -
Click Teams and select the team you want to configure.
- Click the Contact Settings tab.
-
Select values from the Concurrent Chats and Auto-Parked Emails drop-downs to specify the default number of each that agents on the team can handle.
Learn more about auto-parking emails
Auto-parking puts new emails in an agent's inbox automatically. This setting lets you specify how many emails can be auto-parked per team member for the entire team. The maximum is 25. You can also select Off to disable this feature for the team.
- You can customize the type of contacts that specific agents can receive. For example, you might not want to auto-park emails to new agents. To set custom limits:
- Find an agent in the list.
- Enter a new value in the field for each agent.
- Click Save.
Configure Contact Settings for Dynamic Delivery
Required permissions: Teams Edit
|
Field |
Details |
|---|---|
|
Voice |
Whether agents can handle 1 voice interaction at a time or voice interactions are turned Off. Voice interactions include inbound calls, manual outbound calls, Personal Connection dialer calls, and voicemails. |
| Chats, SMS, Emails, Work Items |
The number of interactions an agent can handle at the same time per channel
If you use Digital Experience (DX) and integrated matching:
If you use Digital Experience (DX) and do not have integrated matching, Digital applies to all interactions routed through Digital Experience (DX). Chat and Emails only apply to interactions that come from the legacy channels. |
| Req Contact |
Disables automatic routing of non-voice, or digital, interactions When this isn't selected, interactions route automatically to the agent. This occurs until the agent is handling their maximum interactions or the queue is empty. This is true even when the agent refuses an interaction. This feature isn't currently supported for digital If your agents use Agent Workspace for Salesforce Voice (Agent for Service Cloud Voice), do not enable this option. It is for digital channels, and Agent Workspace for Salesforce Voice (Agent for SCV) only supports voice channels. Enabling it causes issues with Agent Workspace for Salesforce Voice (Agent for SCV). |
| Channel Lock |
Temporarily locks an agent to the channel If your agents use Agent Workspace for Salesforce Voice (Agent for Service Cloud Voice), do not enable this option. It is for digital channels, and Agent Workspace for Salesforce Voice (Agent for SCV) only supports voice channels. Enabling it causes issues with Agent Workspace for Salesforce Voice (Agent for SCV). Note: When you duplicate a team, the Channel Lock setting does not carry over into the new team. You must configure this setting manually in the new team. |
| Auto-focus |
Shifts the agent's view to the new interaction when it is first connected to the interface. |
| Total Contact Count |
The maximum number of total interactions an agent can handle at a time. For example, if you set Chats to 5, Emails to 5, and Total Contact Count to 7, the agent would receive a maximum of seven interactions at any given time. Up to five of those seven contacts could be chat interactions and up to five of them could be email interactions. Only versions 19, 25, and 28 of the PUT /agent API support setting Total Contact Count to 1. Agents can also manually assign themselves digital interactions even if they've met their limit. But they won't be able to handle more interactions until they're below their contact count again. |
-
Click the app selector
and select Admin. -
Click Teams.
- Click the team you want to edit.
- Click the Contact Settings tab.
-
If you use Salesforce External Routing to route chats and cases to your agents, set the default number of Chats and Emails to Off. Otherwise, move to the next step.
-
Set the default number of concurrent interactions for Chats and Emails. Set the default number of maximum concurrent interactions for SMS
-
Enable the Req Contact option to change the experience agents have in the agent application as needed. If your agents use Agent Workspace for Salesforce Voice (Agent for Service Cloud Voice), do not enable this option. It is for digital channels, and Agent Workspace for Salesforce Voice (Agent for SCV) only supports voice channels. Enabling it causes issues with Agent Workspace for Salesforce Voice (Agent for SCV).
-
Enable Channel Lock if you want agents to be able to handle different interaction types but only want them to focus on interactions with a single channel at a time. If your agents use Agent Workspace for Salesforce Voice (Agent for Service Cloud Voice), do not enable this option. It is for digital channels, and Agent Workspace for Salesforce Voice (Agent for SCV) only supports voice channels. Enabling it causes issues with Agent Workspace for Salesforce Voice (Agent for SCV).
-
Enable the Auto-focus option to change the experience agents have in the agent application as needed.
-
Set the Total Contact Count to the maximum number of interactions of any type you want agents on the team to handle at the same time.
-
If you want any agents on the team to have different settings, you can modify them by setting the fields in the Team Defaults section to Off for that agent. Then enter a new value for the setting. Settings at the agent level override settings at the team level. Alternatively, you can configure those settings in the ACD User profile.
- Click Save.