

Complete each of these tasks in the order given.
Prerequisite
Before proceeding, ensure that you have developed middleware to connect your digital channel to NiCE CXone. This is required before you can set up a BYOC integration in NiCE CXone.
Add a BYOC Integration
Each BYOC acts as a new channel type, such as chat or email. This means that each BYOC can contain multiple channels of that type.
- Click the app selector
 and select ACD.
 -
Go to Digital > Bring Your Own Channel.
- Click Add.
- Enter all details for your BYOC channel. Many of these details come from the middleware
 and should be provided by your engineering team.
 Learn more about fields in this step
Field Details Name The name for your channel integration. Integration box URL
The fully-qualified URL to be used for HTTPS message callbacks from NiCE CXone. Message callbacks notify your server of a message event, like message received or message delivered. This is the URL that NiCE CXone should use to communicate with your middleware.
This comes from the middleware and your engineering team should provide this.
Authorization URL The fully-qualified URL of your authentication server. This can be a separate URL from your middleware message processing URL.
If you leave this field blank, the Integration box URL is used.
Add action URL The fully-qualified URL for the page you created to add a channel. You create this page on your own, outside of NiCE CXone.
This comes from the middleware and your engineering team should provide this.
Reconnect action URL The fully-qualified URL for the page you created to reconnect an existing channel if it has been disconnected.
This can be the same as Add action URL, if you only have one page to point to.
This comes from the middleware and your engineering team should provide this.
Remove action URL The fully-qualified URL for the page you created to delete a channel. This can be the same as Add action URL, if you only have one page to point to.
This comes from the middleware and your engineering team should provide this.
Client ID
Used to provide an OAuth 2.0 authorization for message callbacks to your integration.
This comes from the middleware and your engineering team should provide this.
Client Secret Used to provide an OAuth 2.0 authorization for message callbacks to your integration.
This comes from the middleware and your engineering team should provide this.
Token content type Controls how NiCE CXone sends credentials to your OAuth 2.0 /token endpoint. Choose the format that works best with your middleware:
JSON: Send a JSON payload. This is the default.
Form url‑encoded: Send credentials as x-www-form-urlencoded data.
Client Certificate If you have mTLS security enabled, enter the mTLS certificate here. This must be in PEM format.
mTLS secures both sides of a connection. This ensures that both the BYOC middleware and NiCE CXone verify each other.
Your developers implementing your middleware can provide you with the certificate. Your organization is responsible for mTLS implementation. NiCE CXone does not provide or configure this for you.
Enabling mTLS security also enables typing indicators for your BYOC channel. Both agents and contacts see moving dots when the other party is typing.
Private Key If you have mTLS security enabled, enter the certificate's private key here. The private key is mandatory if you want to have mTLS security. This must be in PEM format.
Your developers implementing your middleware can provide you with the key. Your organization is responsible for mTLS implementation. NiCE CXone does not provide or configure this for you.
Certificate Authority The entity who issued your digital certificates. Your engineering team should provide this.
When configuring mTLS, this field is optional. If you leave this blank, it can open your system to certain security risks. If you do not include a certificate authority, NiCE CXone assumes that your certificates were generated legitimately and are correct. If you do want to include a certificate authority, this allows NiCE CXone to verify the certificates before any data is sent.
Certificate Password If the Private Key was password protected, enter the password here. Color The color of the button displayed on the Points of Contact Digital page in NiCE CXone. Icon The icon on the button displayed on the Points of Contact Digital page in NiCE CXone. This icon is also used in the agent UI. Use Digital 3.0 Outbound API for replies Select Enable to automatically update endpoints to the latest version.
- Click Save. This redirects you to the BYOC integrations list page.
- On the BYOC integrations list page, locate your new BYOC and make a note of the Integration ID. You will need it to create a channel.
Set Up Channels and Messages
-
Go to Digital > Points of Contact Digital.
-
Click the button for your BYOC. This opens the URL you entered in the Add action URL field when you set up your integration.
-
If your engineering team built a user-friendly UI with the middleware
, you can complete a form to create a digital Any channel, contact, or skill associated with Digital Experience (DX).point of contact The entry point that an inbound contact uses to initiate an interaction, such as a phone number or email address. (channel). Otherwise, you can call the Channel API directly. For this step, you will need the Integration ID that was generated when you created the BYOC integration.View example
var(--codeSnippetCopyLabel)Example Channel API callPOST /dfo/3.0/contact/channels
{
"id": "cd7d9728-5c64-433f-b49b-8924c97c2aa6",
"idOnExternalPlatform": "myOwnId45678",
"channelIntegrationId": "YOUR INTEGRATION ID",
"realExternalPlatformId": "forum",
"name": "My discussion forum",
"isPrivate": true,
"hasTreeStructure": false
}Any messages sent through this channel are automatically handled by the middleware using the Message API
. View example
var(--codeSnippetCopyLabel)Example Message API call
POST /dfo/3.0/channels/YOUR CHANNEL ID/messages
{
   "idOnExternalPlatform":"comment-300001",
   "thread":{
      "idOnExternalPlatform":"thread-1001"
   },
   "messageContent":{
      "type":"TEXT",
      "payload":{
         "text":"Hello, can you help me, please?"
      }
   },
   "createdAtWithMilliseconds":"2021-01-15T03:20:50.52-04:00",
   "direction":"inbound",
   "authorEndUserIdentity":{
      "idOnExternalPlatform":"5459",
      "firstName":"Peter",
      "lastName":"Solo",
      "nickname":"@peter007"
   }
}
Delete Channels
To delete a channel, you can call the Digital Engagement API ![]() directly or use the Digital Experience (DX) interface. To delete a channel from Digital Experience (DX):
directly or use the Digital Experience (DX) interface. To delete a channel from Digital Experience (DX):
-
Go to Digital > Points of Contact Digital.
-
Locate the channel in the Your Channels list.
-
Click Delete. This opens the URL you entered in the Remove action URL field when you set up your integration.
Create a Digital Message Template
Required permissions: Message Templates Create
Complete these steps for each message you want to send to contacts.
-
Click the app selector
and select ACD. -
Go to Outbound > Message Templates.
-
Click Create New.
-
Set the Type to Digital and enter a Name for the message template.
- Enter the Message Body.
- If you want to add variables to the message body, type the exact name of a mapped field in the contact list and enclose it in curly brackets. For example, if your contact list has a column called FirstName and you enter {FirstName} somewhere in the Message Body, the contact's first name will appear in the message in place of the variable.
- Select the Direction if the language of the message reads right to left.
- Click Create.
Create a Digital Outbound ACD Skill
After you create an ACD skill, you can modify it if you need to enable call suppression. This is not required, but some digital providers may require it.
The name of a skill should be meaningful and unique. It's helpful to be consistent when naming skills. Decide on a standard format for skill names that works for your organization.
A skill name must have a minimum of 2 characters and a maximum of 30. Skill names may only contain letters, numbers, and these special characters:
- Hyphens (-)
- Underscores (_)
- Periods (.)
- Colons (:)
-
Click the app selector
and select ACD. -
Go to Contact Settings > ACD Skills.
-
Click Create New > Single Skill.
- Set the Media Type to Digital and Inbound/Outbound to Outbound.
- Enter a Skill Name.
- Set the Digital POC to Bring Your Own Channel.
- Select the Digital POC Name of the channel you're using.
- Select the Campaign you want the skill to be part of.
- Select a Message Template from the drop-down.
-
Configure the remaining optional fields in the Skill Information section as needed.
Learn more about fields in this step
Field Details Agentless Personal Connection automatically dials phone numbers of contacts from a calling list and plays either a pre-recorded message or an IVR
Interactive Voice Response. Automated phone menu contacts use via voice or key inputs to obtain information, route an inbound voice call, or both. menu.This is selected by default for Proactive SMS, Proactive Email, and digital Bring Your Own Channel. It cannot be cleared.
Don't select for agent dialing.
When this is selected, Workforce Intelligence Minimum Agents and Workforce Intelligence Minimum Available Agents are not available.
Enable Priority-Based Blending When selected, this field enables priority-based blending
Agents can receive interactions from all eligible ACD, Personal Connection dialer, and Digital Experience (DX) skills assigned to them, based on relative skill priority. Personal Connection skills work as they normally would, no matter the dialing ratio. for the skill. This means that when an agent logs into the system and sets the state to available, they receive communications from all eligible skills. The order of contact delivery is based on the relative skill priority. If you choose to use priority-based blending, you must configure priority-based blending for all skills you want an agent to use at the same time.Message Template The message template for this skill. This option only applies to Proactive SMS and Proactive Digital BYOC skills.
Do not allow transfers to skill when closed Determines whether interactions can be transferred to this skill when its hours of operation profile is set to Closed. Select to prevent transfer or leave unselected to allow transfer during closed hours.
-
If your system is configured for divisions, use the Division field to specify which division
Separate data securely between lines of business. Data can only be accessed from within the division it's part of. to assign the skill to. After you have assigned the skill to a division, you cannot change it. To configure this option, you must have the Division Assignment permission. - Click Create. Complete additional configurations to customize or manage your skills.
Upload Calling List
You need to upload a calling list of the contacts you want to reach out to with your new channel. If you haven't created your calling list, yet, do so now.
If you're re-uploading a calling list after making critical updates, stop the associated ACD skill. Restart the ACD skill when you're done uploading calling lists.
-
Click the app selector
and select ACD. -
Go to Lists > Calling.
-
Click Select File.
-
Read the compliance agreement and click Accept to continue.
-
Enter a List Name. Select the Upload New radio button if you want to select a new list from your computer, or Select Existing if you want to modify a list you already uploaded.
If uploading, click Choose File. If modifying, type the File Name or click Browse. Find and select the calling list you want to upload or use. Configure any optional fields as needed.
Learn more about fields in this step
Field
Details
List Expiration Date The date the calling list is removed from NiCE CXone. This setting doesn't affect the expiration of the individual records in the list. To set the expiration date for the records in the list, use the Batch expiration date field in the next step of the upload wizard. Skill If you want to assign the calling list to a specific ACD skill Used to automate delivery of interactions based on agent skills, abilities, and knowledge., select one from the Skill drop-down. You cannot upload the list to a Proactive SMS skill if there is no message template assigned to the skill.Start Skill When Completed
The Skill you selected starts automatically when NiCE CXone finishes processing the calling list.
- Click Next.
- If you used the first row of your calling list to label the columns, select Use First Row as Column Names next to Header. Review the automatic mapping done by PC, map any unmapped fields, and configure time zone handling and an expiration date. Learn more about fields in this task
Field
Details
No time zone found? The action NiCE CXone takes if it can't use calling list data to map a time zone to the record. NiCE CXone checks the record first for a time zone, then a zip code, then a city and state, and finally the area code of the primary phone number.
If NiCE CXone can't match a time zone to the record, it takes the action you specify here:
- Reject: Removes the record from eligibility for dialing.
- Select time zone: Attaches a default time zone to the record. Use the drop-down to select the default time zone.
If you live outside of North America, or if you believe the automatic time zone mapping won't work for your calling list, designate the appropriate time zone for each record on your list. See Set Up BYOC for Proactive Digital for a list of time zone abbreviations and full names.
Batch expiration date The default expiration date for all records in this batch. Once the contact expires, PC no longer attempts to reach that contact. You can specify expiration dates for individual records in the calling list by including an expiration date column in the calling list itself and then mapping the column to the Expiration Date field.
The expiration occurs at the beginning of the date you select (12:00 AM).
-
If it's not already done for you, map your phone numbers and email addresses in Map Destinations. Add and remove destinations as needed.
If you map a phone field to a specific ACD skill, it appears under the cadence options for that skill. If you don't want to include a specific phone number in the Maximum Attempts or cadence calling order, don't map those phone number to fields. Once you map the field, you can't remove it from the cadence settings.
- When the file uploads, PC displays the progress and the number of records that loaded successfully and unsuccessfully. If the calling list contains invalid records, use the following steps to fix the errors.
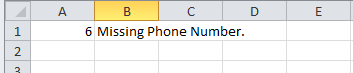
Click Download Link in the warning box that appears.
Open the file to view the problems with the upload. In this example, the record in row 6 doesn't have a phone number:
- Fix the problem in the calling list and save it.
- Upload the updated file.
Start the New ACD Skill
Required permissions: Dialer Manager Edit and access to campaigns
If you plan to create a schedule, you can skip this step. If you want to manually turn your PC ACD skill off and on, do the following steps after completing all configuration.
-
Click the app selector
and select ACD. -
Go to Contact Settings > ACD Skills.
-
Click the skill
Used to automate delivery of interactions based on agent skills, abilities, and knowledge. you want to start. -
Click Start.
-
When you are done using the skill, click Stop.